
This article has been archived, as it was published several years ago, so some of its information might now be outdated. For more recent articles, please visit the main article feed.
Three ways to render a SwiftUI view in a playground
Discover page available: SwiftUIAlthough Xcode Previews is quickly becoming the go-to development tool for quick iterations and prototyping when building SwiftUI views, there are still situations when firing up a Swift playground can be the quickest and easiest way to try out a new UI idea.
Using UIHostingController
One of the ways to render a SwiftUI view within a playground’s live view is to wrap it in a UIHostingController, which can then be assigned to the liveView property of the current PlaygroundPage — for example like this:
import SwiftUI
import PlaygroundSupport

struct MyExperimentalView: View {
    var body: some View {
        ...
    }
}

let view = MyExperimentalView()
let hostingVC = UIHostingController(rootView: view)
PlaygroundPage.current.liveView = hostingVC
Calling setLiveView
Although the above setup is not super verbose by any stretch of the imagination, it turns out that there’s an even simpler way to perform the above liveView assignment — and that’s by using the setLiveView method, which essentially performs the exact same UIHostingController wrapping that we did above, but in a way that doesn’t require any additional code on our part:
import SwiftUI
import PlaygroundSupport

struct MyExperimentalView: View {
    var body: some View {
        ...
    }
}

let view = MyExperimentalView()
PlaygroundPage.current.setLiveView(view)
Pinning views to a playground’s timeline
While both of the above two methods work great in many different kinds of situations, it’s definitely possible to encounter various kinds of SwiftUI errors that seem to only happen when rendering a view within a playground. Thankfully, if you ever do encounter any of those errors, there’s a third option that can be surprisingly powerful.
A feature that Swift playgrounds have supported since day one is that any value can be pinned to a playground’s timeline, which enables us to visualize the outcomes of our expressions in various ways. In the case of SwiftUI views, pinning a View expression actually results in that view being rendered inline, right within Xcode’s code editor.
For example, if we pin our above MyExperimentalView() expression by using the rectangular icon in the timeline on the right, it’ll now be rendered inline like this:
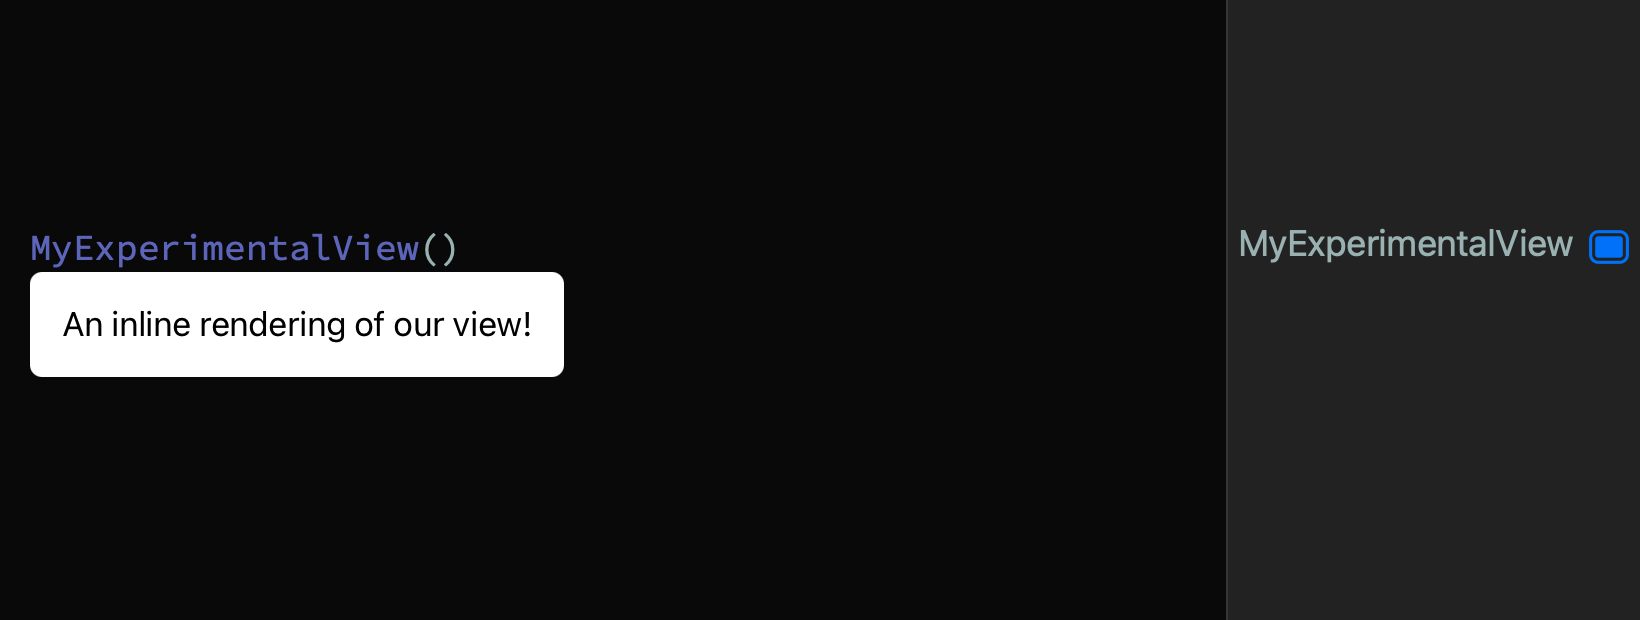
What’s especially cool about this last technique is that it enables us to render multiple views at the same time, just like we can when using Xcode’s Preview feature.
Conclusion
So, there you have it. Three different ways to render a SwiftUI view within a playground. I still use playgrounds almost every single day. As someone who experiments a lot with both UI development and other Swift techniques, I find playgrounds to be an incredibly convenient tool, since I don’t have to create a whole proper Xcode project just to try out a quick idea.
Thanks for reading!

Swift by Sundell is brought to you by the Genius Scan SDK — Add a powerful document scanner to any mobile app, and turn scans into high-quality PDFs with one line of code. Try it today.