
This article has been archived, as it was published several years ago, so some of its information might now be outdated. For more recent articles, please visit the main article feed.
Building modern collection views in Swift
During the past two years, in iOS 13 and 14, Apple have made a number of significant changes to UICollectionView and the various types that surround it. Not only have new APIs been introduced, but the fundamental concepts and conventions used to build collection views have shifted to embrace a series of modern programming trends — such as declarative UI development, composition, and strong type safety.
As such, the term “modern collection views” is often used, both by Apple and the community in general, to refer to these new APIs and conventions — rather than the ones that UICollectionView originally used when it was introduced in iOS 6. This week, let’s take a look at some of those modern tools, and how collection views can be built using them.
Diffable data sources
One of the most commonly faced problems when working with collection views on operating systems prior to iOS 13 comes from the fact that all updates need to be manually coordinated by the programmer (using APIs like performBatchUpdates), which in turn very often results in crashes and errors when those updates end up out of sync with the underlying data model being used.
When using UICollectionViewDiffableDataSource, however, that’s no longer the case — as, like its name implies, that class will calculate diffs between the states being applied to it, and will then automatically perform the correct view updates on our behalf.
For example, let’s say that we’re working on some form of shopping app that includes a ProductListViewController for displaying a given list of products. To make that view controller use a diffable data source, we’d first have to create one using a cellProvider closure that converts a given index path and model into a UICollectionViewCell — like this:
private extension ProductListViewController {
    func makeDataSource() -> UICollectionViewDiffableDataSource<Section, Product> {
        UICollectionViewDiffableDataSource(
            collectionView: collectionView,
            cellProvider: { collectionView, indexPath, product in
                let cell = collectionView.dequeueReusableCell(
                    withReuseIdentifier: Self.cellReuseID,
                    for: indexPath
                ) as! ListCollectionViewCell

                cell.textLabel.text = product.name
                ...

                return cell
            }
        )
    }
}
Even before we’ve started exploring the diffable aspects of the above API, we can already see that it makes good use of Swift’s strong type system — by both ensuring complete type safety for our model data, and by letting us use any custom Hashable type for identifying our sections (rather than always having to refer to them by their Int-based index). In this case we’re using an enum called Section to do just that:
private extension ProductListViewController {
    enum Section: Int, CaseIterable {
        case featured
        case onSale
        case all
    }
}
Next, let’s assign the above data source to our collection view, just like we would when using the previous (should we call them “classic”?) set of APIs:
class ProductListViewController: UIViewController {
    private static let cellReuseID = "product-cell"

    private lazy var collectionView = makeCollectionView()
    private lazy var dataSource = makeDataSource()

    ...

    override func viewDidLoad() {
        super.viewDidLoad()

        // Registering our cell class with the collection view
        // and assigning our diffable data source to it:
        collectionView.register(ListCollectionViewCell.self,
            forCellWithReuseIdentifier: Self.cellReuseID
        )
        collectionView.dataSource = dataSource
        ...
    }

    ...
}
Note that we have to retain our data source separately within the above view controller, since a UICollectionView doesn’t hold a strong reference to its data source.
Then, whenever our underlying data model was updated, we simply have to describe the current view state to our diffable data source, and it’ll automatically take care of all of the actual cell updates for us.
To do that, we’ll create a snapshot — which we’ll first add our section identifiers to, and we’ll then fill each of those sections with the data from our model (in this case a type called ProductList). Finally, we’ll apply that snapshot to our data source, which it’ll use to update our collection view after performing a diff against any previous state that it contained:
private extension ProductListViewController {
    func productListDidLoad(_ list: ProductList) {
        var snapshot = NSDiffableDataSourceSnapshot<Section, Product>()
        snapshot.appendSections(Section.allCases)

        snapshot.appendItems(list.featured, toSection: .featured)
        snapshot.appendItems(list.onSale, toSection: .onSale)
        snapshot.appendItems(list.all, toSection: .all)

        dataSource.apply(snapshot)
    }
}
Worth noting about the above series of code samples is that we’re passing our Product models directly to our data source — which can be done since this particular model type conforms to Hashable. However, if we for some reason wouldn’t be able to have our models conform to that protocol — or if passing them around that way would be too expensive, or otherwise troublesome — then we could always pass some form of identifiers to our data source instead, and then resolve the complete model for each identifier within our cellProvider closure.
By default, a diffable data source will also automatically determine what kind of animations that should be used when applying a given snapshot, which is something that can be tweaked by passing additional arguments to the apply method that we called above.
Cell registrations
The concept of cell registrations is new in iOS 14, and enables us to encapsulate the registration of a given UICollectionViewCell subclass — as well as our cell configuration code — within a dedicated object. The benefit of that is both that we no longer have to remember to always register the correct cell type for a given reuse identifier, and that we again get complete type safety within our cell configuration code — no more cell type casting required.
Here’s how we could use that new API to implement the registration and configuration of the collection view cells within our ProductListViewController:
private extension ProductListViewController {
    typealias Cell = ListCollectionViewCell
    typealias CellRegistration = UICollectionView.CellRegistration<Cell, Product>

    func makeCellRegistration() -> CellRegistration {
        CellRegistration { cell, indexPath, product in
            cell.textLabel.text = product.name
            ...
        }
    }
}
With the above in place, we can now go back to our makeDataSource method from before and modify our cellProvider closure to simply return the result of dequeuing a cell using our new registration implementation — like this:
private extension ProductListViewController {
    func makeDataSource() -> UICollectionViewDiffableDataSource<Section, Product> {
        let cellRegistration = makeCellRegistration()

        return UICollectionViewDiffableDataSource(
            collectionView: collectionView,
            cellProvider: { collectionView, indexPath, product in
                collectionView.dequeueConfiguredReusableCell(
                    using: cellRegistration,
                    for: indexPath,
                    item: product
                )
            }
        )
    }
}
That’s already a quite substantial improvement over our earlier code, but since the above is a pattern that we’re likely to repeat within different collection views across our app — let’s see if we can make it even nicer by making it possible to retrieve a cellProvider closure directly from our cell registration instance, which could be done by adding the following extension:
extension UICollectionView.CellRegistration {
    var cellProvider: (UICollectionView, IndexPath, Item) -> Cell {
        return { collectionView, indexPath, product in
            collectionView.dequeueConfiguredReusableCell(
                using: self,
                for: indexPath,
                item: product
            )
        }
    }
}
Using the above new method, we’d now be able to reduce our data source construction code to this single expression:
private extension ProductListViewController {
    func makeDataSource() -> UICollectionViewDiffableDataSource<Section, Product> {
        UICollectionViewDiffableDataSource(
            collectionView: collectionView,
            cellProvider: makeCellRegistration().cellProvider
        )
    }
}
Really nice! While the new CellRegistration API is certainly something that we could’ve built ourselves prior to iOS 14 (and many teams did), it’s a great addition to the built-in suite of APIs, as it perfectly complements diffable data sources to further remove common sources of ambiguity from our collection view-related code.
Also worth noting is that, with the above change in place, we can now remove our cell class registration code from our view controller’s viewDidLoad method.
Compositional layouts
Apart from creating data sources and registering cell classes, the other major piece of building a UICollectionView-based UI is defining its layout. Prior to iOS 13, we essentially had two distinct options on how to do that — we either used UICollectionViewFlowLayout, which has been available since collection views were first introduced, or we had to build our own custom layout completely from scratch.
But now (if the app that we’re working on uses iOS 13 as its minimum deployment target) we have a third option — which provides a neat middle ground between the two previous approaches — and that’s to use the new compositional layouts system.
When defining a compositional layout, we do so by composing three different layout constructs — items, groups and sections. An item describes the layout for an individual cell, a group lets us encapsulate multiple cells into a combined layout element, and a section determines the overall layout of a given section within our collection view.
As an example, let’s say that we wanted to give our above product list view a layout in which our featured and onSale sections are rendered using a two-column grid, while our all section is rendered as a full-width list. To make that happen, let’s start by defining our grid layout, which could be done like this:
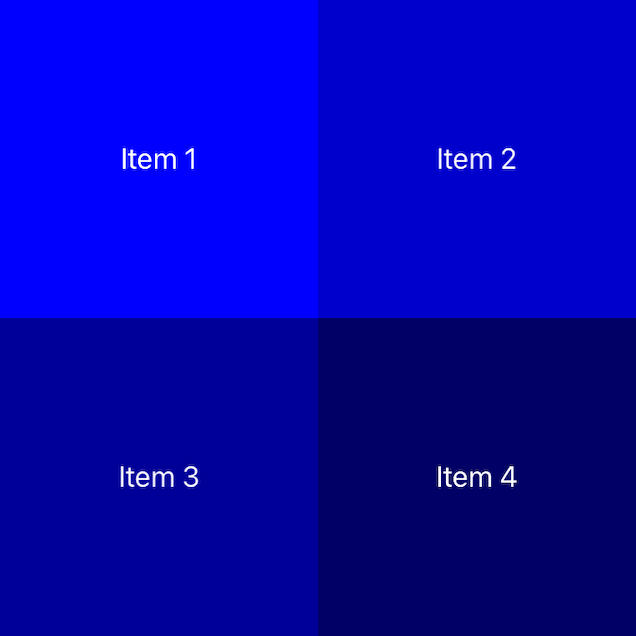
private extension ProductListViewController {
    func makeGridLayoutSection() -> NSCollectionLayoutSection {
        // Each item will take up half of the width of the group
        // that contains it, as well as the entire available height:
        let item = NSCollectionLayoutItem(layoutSize: NSCollectionLayoutSize(
            widthDimension: .fractionalWidth(0.5),
            heightDimension: .fractionalHeight(1)
        ))

        // Each group will then take up the entire available
        // width, and set its height to half of that width, to
        // make each item square-shaped:
        let group = NSCollectionLayoutGroup.horizontal(
            layoutSize: NSCollectionLayoutSize(
                widthDimension: .fractionalWidth(1),
                heightDimension: .fractionalWidth(0.5)
            ),
            subitem: item,
            count: 2
        )

        return NSCollectionLayoutSection(group: group)
    }
}
Tip: You can use the above code sample’s PREVIEW button to see an example of what that layout looks like when rendered.
Like the above example shows, the power of compositional layouts isn’t just that we’re able to compose multiple layout constructs into one, but also that we can now more easily describe our desired layout using fractional values — which means that we no longer have to do any “pixel math” ourselves, and that our layout will automatically adapt to the size of the screen that our app is being displayed on.
Next, let’s define the list layout that we’ll use for our all section at the bottom of our collection view:
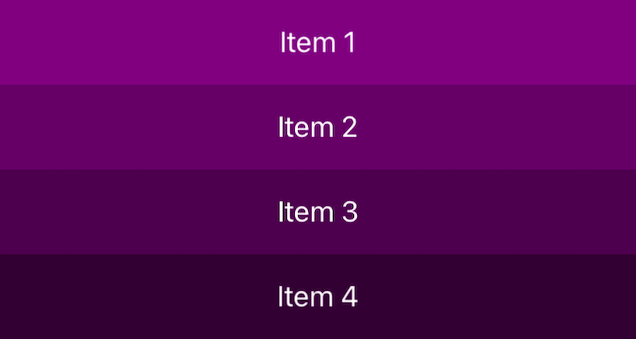
private extension ProductListViewController {
    func makeListLayoutSection() -> NSCollectionLayoutSection {
        // Here, each item completely fills its parent group:
        let item = NSCollectionLayoutItem(layoutSize: NSCollectionLayoutSize(
            widthDimension: .fractionalWidth(1),
            heightDimension: .fractionalHeight(1)
        ))

        // Each group then contains just a single item, and fills
        // the entire available width, while defining a fixed
        // height of 50 points:
        let group = NSCollectionLayoutGroup.vertical(
            layoutSize: NSCollectionLayoutSize(
                widthDimension: .fractionalWidth(1),
                heightDimension: .absolute(50)
            ),
            subitems: [item]
        )

        return NSCollectionLayoutSection(group: group)
    }
}
With the above two pieces in place, it’s now time to utilize the composing aspect of compositional layouts — by defining our final layout using a closure that resolves the correct NSCollectionLayoutSection given an Int-based section index:
private extension ProductListViewController {
    func makeCollectionViewLayout() -> UICollectionViewLayout {
        UICollectionViewCompositionalLayout {
            [weak self] sectionIndex, _ in

            switch Section(rawValue: sectionIndex) {
            case .featured, .onSale:
                return self?.makeGridLayoutSection()
            case .all:
                return self?.makeListLayoutSection()
            case nil:
                return nil
            }
        }
    }
}
Now all that remains is to make our UICollectionView use the above layout, for example by injecting it when our collection view is being created:
private extension ProductListViewController {
    func makeCollectionView() -> UICollectionView {
        UICollectionView(
            frame: .zero,
            collectionViewLayout: makeCollectionViewLayout()
        )
    }
}
The above series of examples is of course just a quick look at compositional layouts, which offer a number of powerful customization options — such as the ability to add insets to each item, group and section — so we’ll most likely take a much closer look at this suite of APIs in future articles.
List views and content configurations
Finally, let’s take a look at how iOS 14 builds upon many of the above concepts to make it possible to build table view-like lists using UICollectionView. For example, in order to render our all section, we could now simply use the pre-defined list layout section, rather than having to create our own:
private extension ProductListViewController {
func makeCollectionViewLayout() -> UICollectionViewLayout {
UICollectionViewCompositionalLayout {
[weak self] sectionIndex, environment in
switch Section(rawValue: sectionIndex) {
case .featured, .onSale:
return self?.makeGridLayoutSection()
case .all:
// Creating our table view-like list layout using
// a given appearence. Here we simply use 'plain':
return .list(
using: UICollectionLayoutListConfiguration(
appearance: .plain
),
layoutEnvironment: environment
)
case nil:
return nil
}
}
}
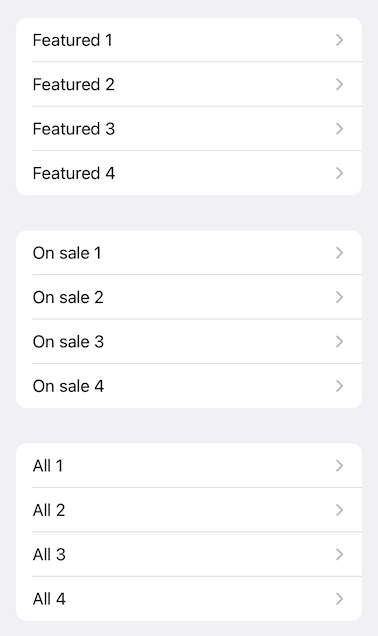
}While the above is already a neat improvement, let’s also take a look at how our setup could be drastically simplified if we were to render our entire product list using a table view-like layout. If that would be the case, then we could’ve simply used the ready-made list layout that UIKit ships with — which means that we no longer would have to write any custom layout code at all. All that we’d have to do would be to again specify our desired list appearance — insetGrouped in this case:
private extension ProductListViewController {
    func makeCollectionView() -> UICollectionView {
        let layout = UICollectionViewCompositionalLayout.list(
            using: UICollectionLayoutListConfiguration(
                appearance: .insetGrouped
            )
        )

        return UICollectionView(
            frame: .zero,
            collectionViewLayout: layout
        )
    }
}
We could then also make use of the new UICollectionViewListCell type, which is a built-in collection view cell that mimics the appearance of UITableViewCell — in that it’s capable of rendering things like texts, images, as well as accessories such as disclosure indicators. Here’s what our makeCellRegistration method could look like if we were to adopt that cell class:
private extension ProductListViewController {
    typealias Cell = UICollectionViewListCell
    typealias CellRegistration = UICollectionView.CellRegistration<Cell, Product>

    func makeCellRegistration() -> CellRegistration {
        CellRegistration { cell, indexPath, product in
            var config = cell.defaultContentConfiguration()
            config.text = product.name
            ...
            cell.contentConfiguration = config

            cell.accessories = [.disclosureIndicator()]
        }
    }
}
Above we’re using yet another new UIKit feature introduced in iOS 14 — content configurations — which let us describe the content that we’d like a given cell to render, without having to directly modify that cell’s subviews. That, in turn, can help us completely decouple our cell configuration code from the underlying cell implementations that are used to render our UI — further making our code more dynamic and less intertwined.

Swift by Sundell is brought to you by the Genius Scan SDK — Add a powerful document scanner to any mobile app, and turn scans into high-quality PDFs with one line of code. Try it today.
Conclusion
While UICollectionView has undergone some quite major changes over the last couple of years, all of those changes have been purely additive — meaning that we can both gradually adopt the new APIs whenever we’re ready to do so, and also that (if we’d like) we can keep using the “classic” way of building collection views without any deprecation warnings or substantial downsides (at least not for now).
That flexibility can, of course, also be a source of confusion — especially for new developers — as it’s not always clear what APIs that makes a collection view implementation “modern”, versus which of the APIs that are considered “legacy”. So I hope that this article has provided a neat overview of those more modern APIs, and I’m looking forward to do more detailed articles on some of them in the future as well.
Got any questions, comments or feedback? You’re more than welcome to contact me. The best way to reach me is either via Twitter or email.
Thanks for reading! 🚀